How to Turn On or Off Always Underline Access Keys in Windows 11?
What are the multiple methods to Turn On or Off Always Underline Access Keys in Windows 11?
Access keys provide an efficient way to navigate through menus and options using keyboard shortcuts. In Windows 11, you have the choice to always underline access keys, making them visible even when you’re not actively using the keyboard. Access keys are shortcuts that allow users to quickly navigate through menus and select options with specific key combinations. Underlining access keys makes them visible at all times, ensuring that users can see which keys correspond to each command. This feature is particularly useful for accessibility purposes or for users who rely heavily on keyboard shortcuts. This tutorial covers multiple methods to turn on or turn off always underline access keys in windows 11 pc.
Always underlining access keys can improve accessibility for users who rely on keyboard navigation. This feature provides a constant visual reference, making it easier to locate and use access keys without needing to guess or remember shortcuts.
Method 1: Using the Settings App
The Settings app is the quickest way to enable or disable always underlined access keys. Here’s how:
- Open Settings by pressing Winkey + I on your keyboard.
- Navigate to Accessibility in the left pane.
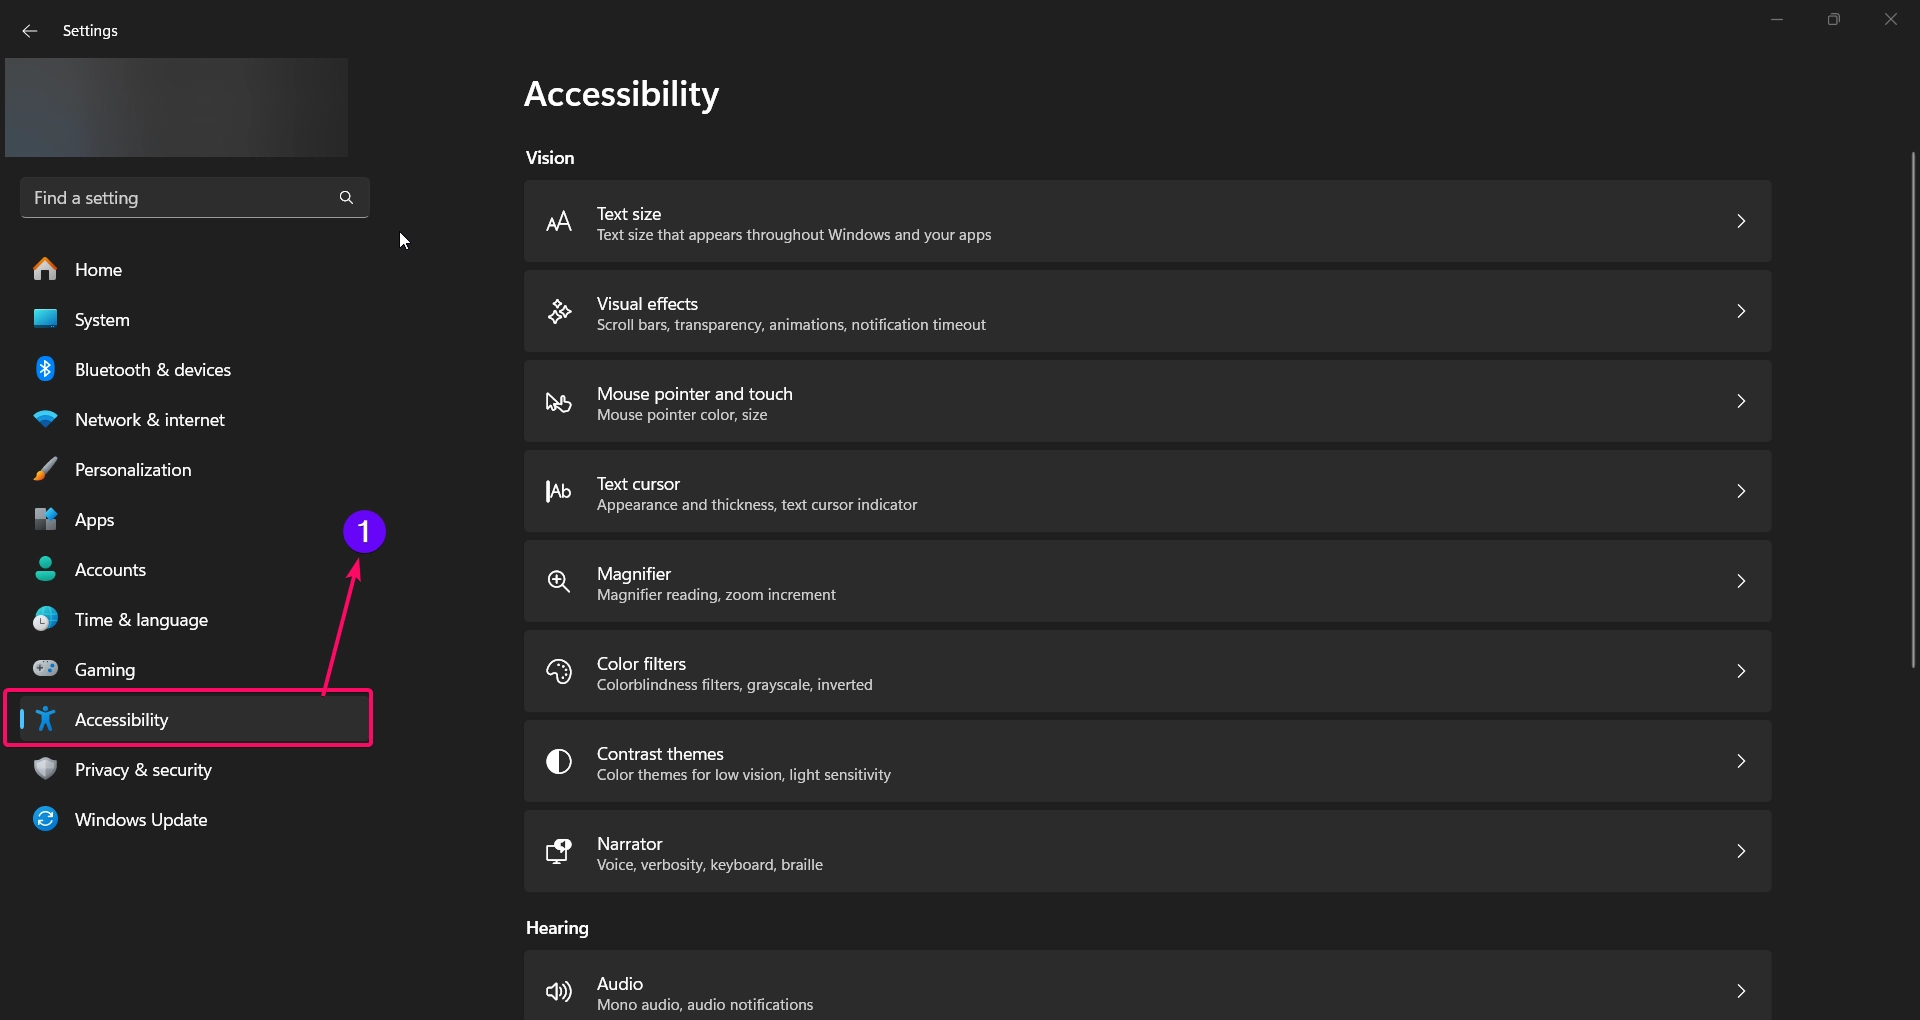
- Scroll down and click on Keyboard.
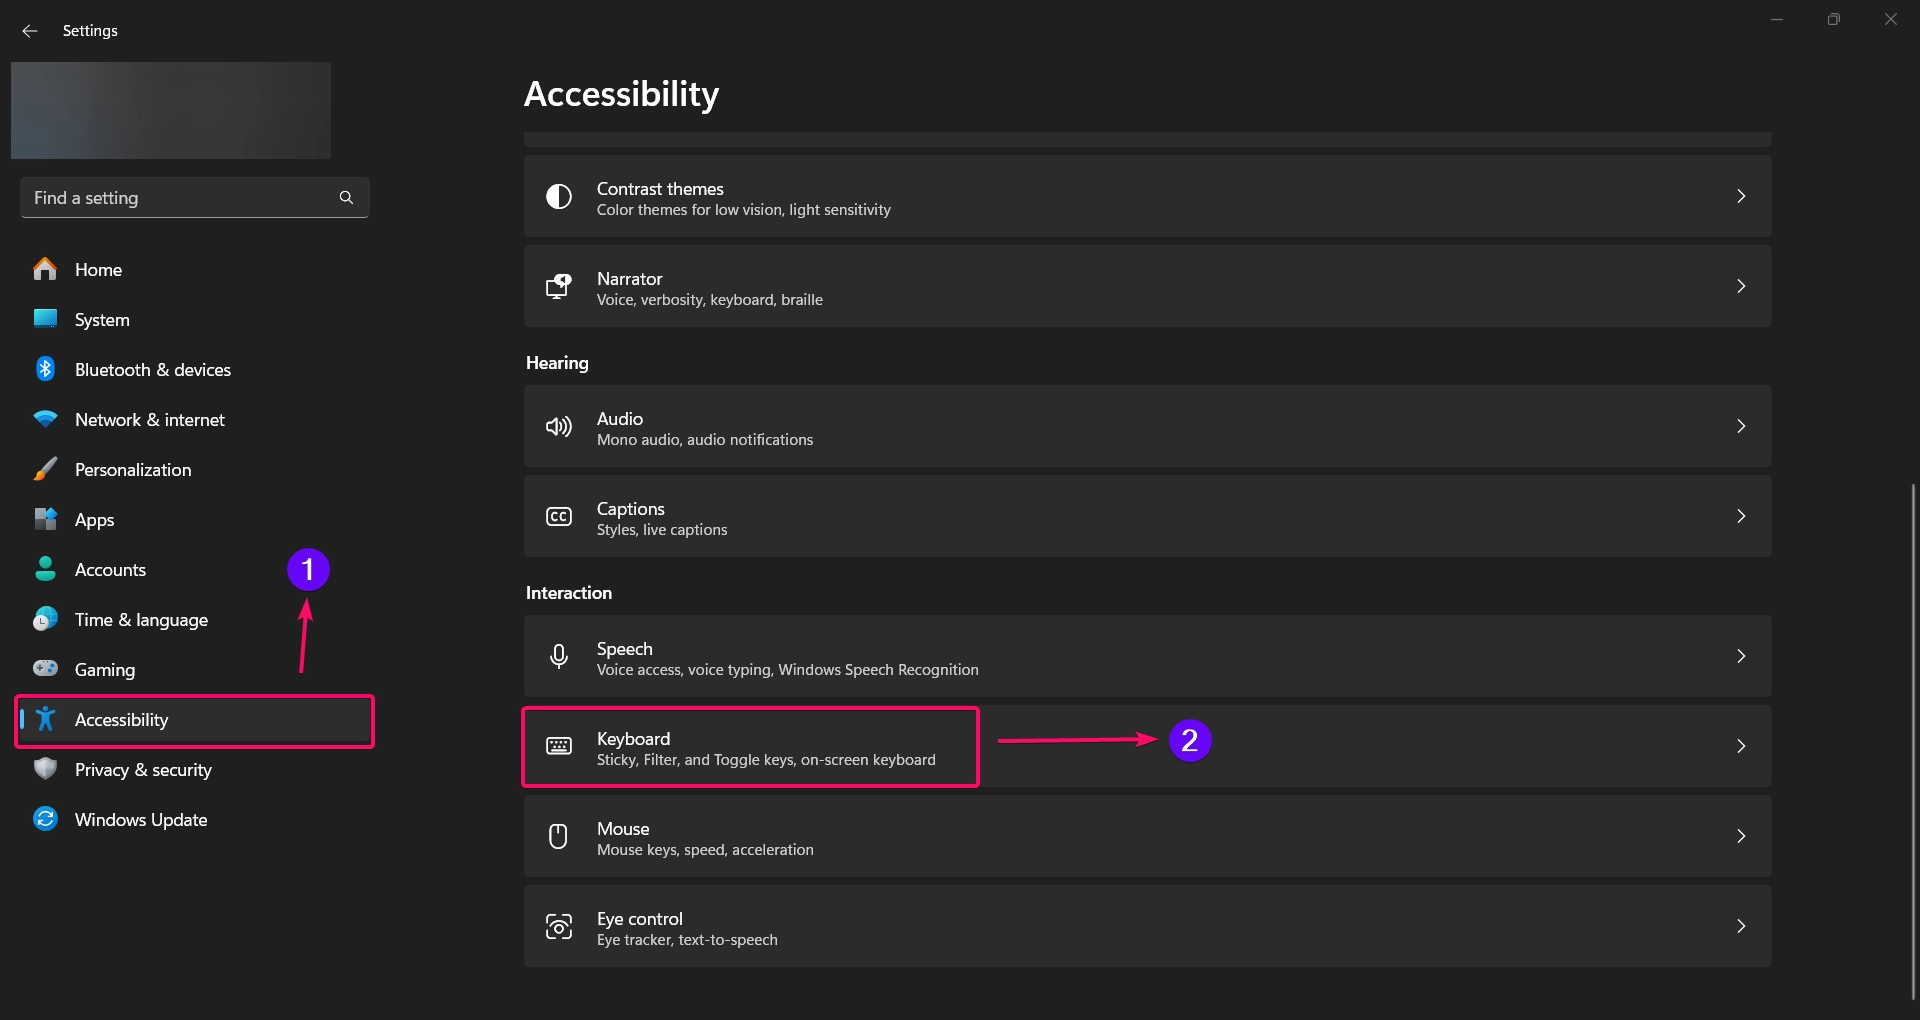
- In the Keyboard section, find the option Underline access keys when available.
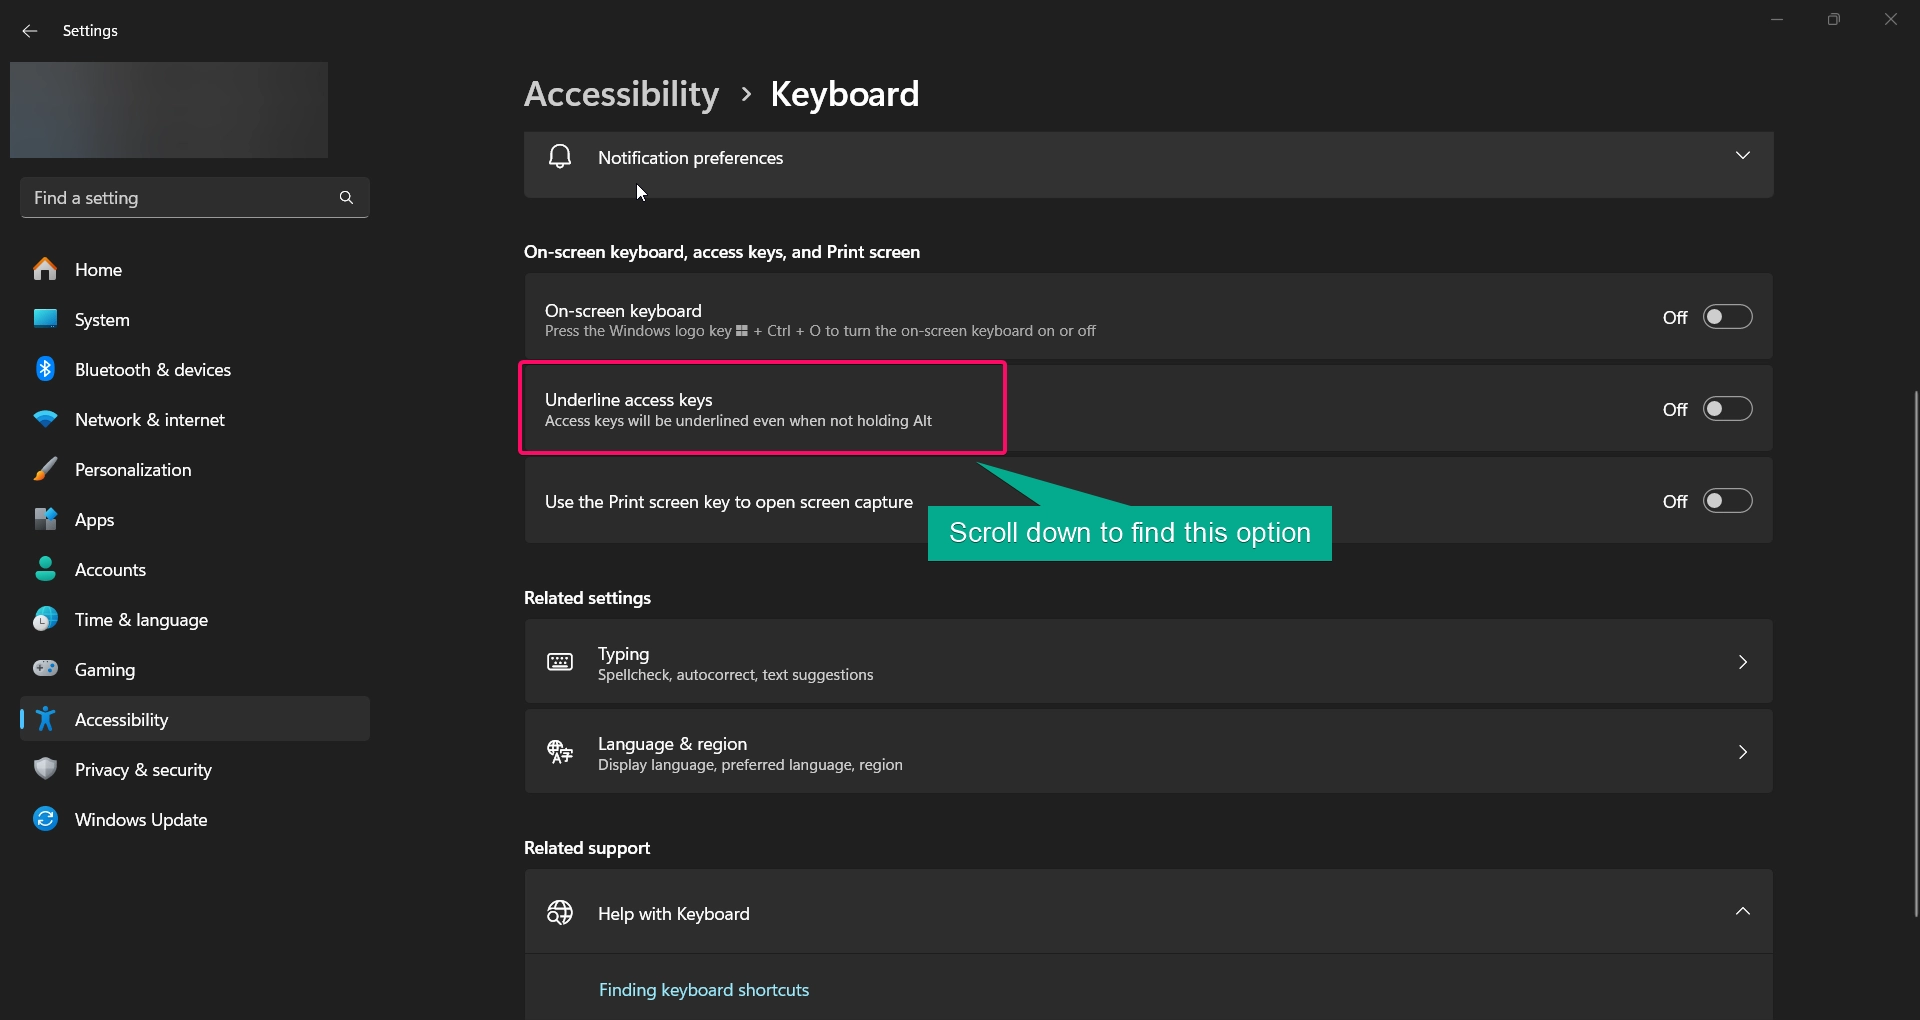
- Toggle this option On to enable underlined access keys or Off to disable them.
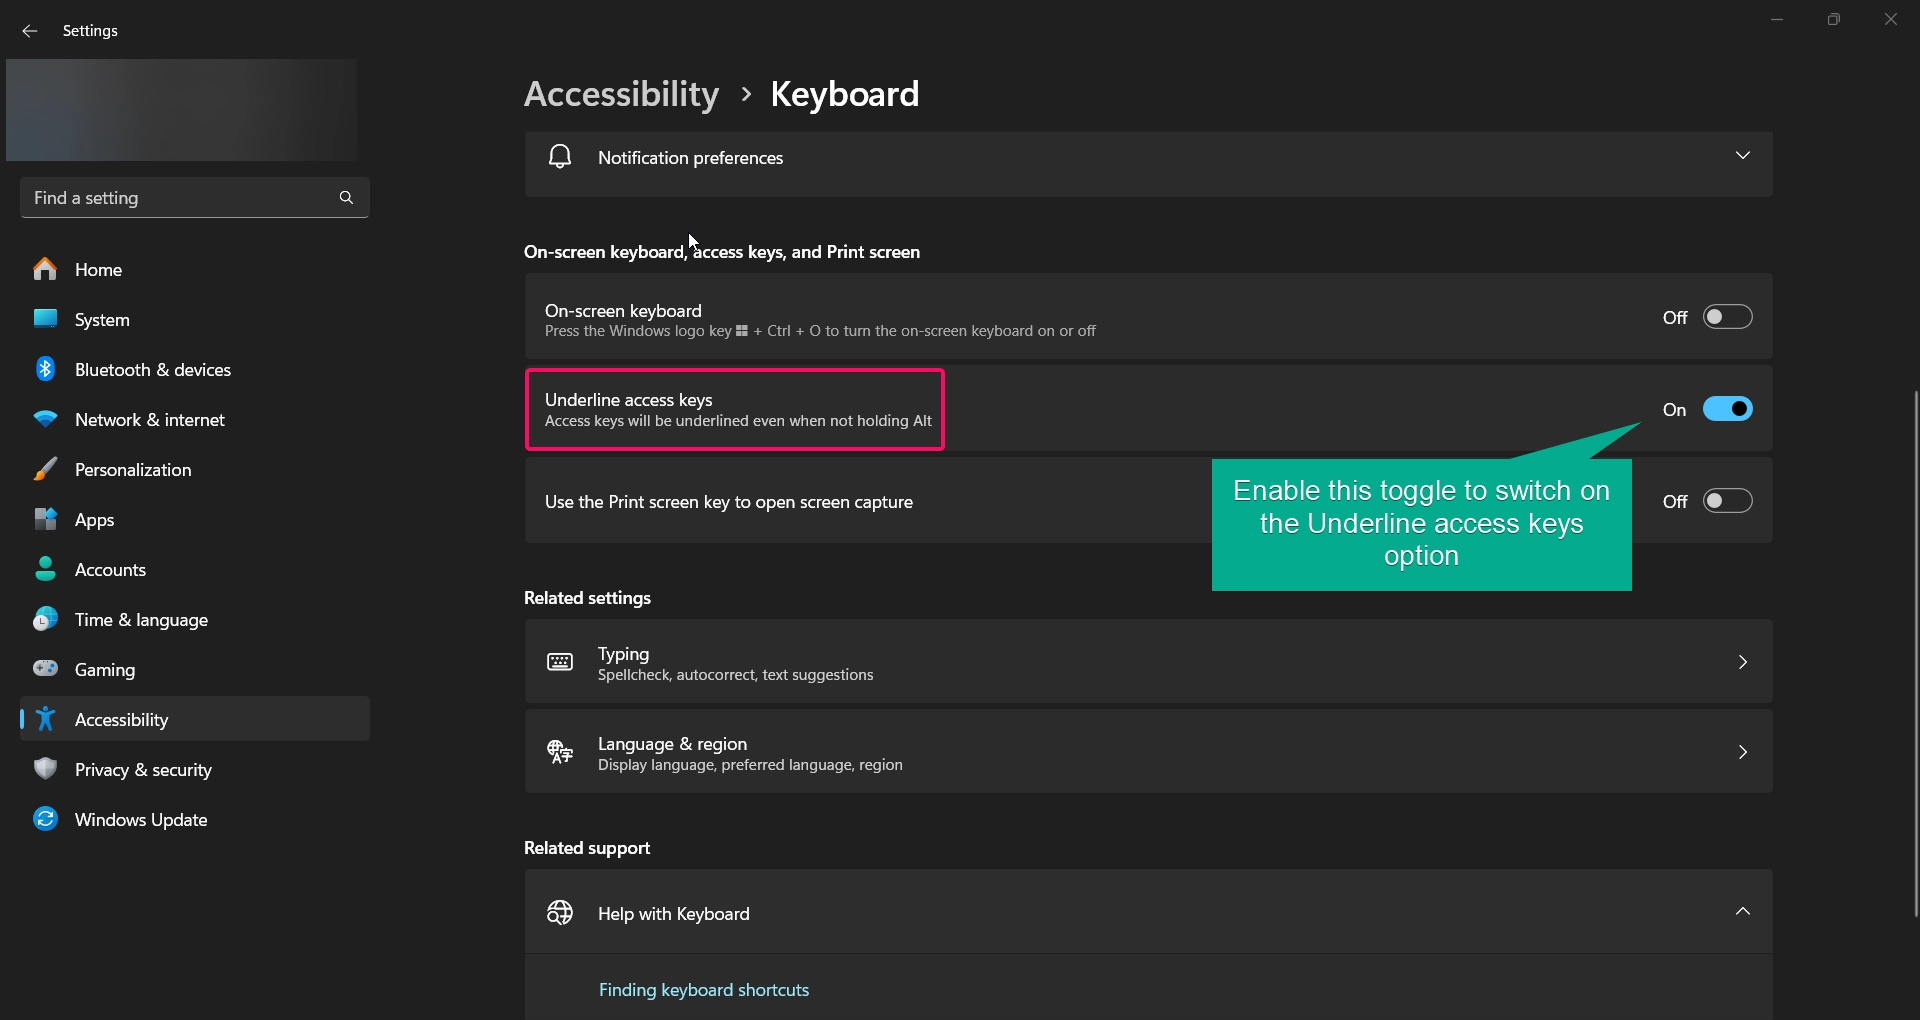
This change will apply immediately, making access keys visible or hidden based on your preference. To disable this option, simply toggle off the switch in the Underline access keys option shown in the above image.
You can face some issues while disabling the underline access keys options such as, “The option is disabled but still the underline is appearing!“- How to fix this issue?
From Microsoft answers, You need to follow the steps to fix this issue:
- Go to Windows Update and and choose the Check for updates option.

- Once the update completed, you need to open the command prompt as administrator.
- Run the following command,
Sfc /ScanNow - Now run the next command,
Dism /Online /Cleanup-image /RestoreHealth - Wait for the command to be executed completely.
- Once the command is executed 100%, the issue will be resolved and restart your pc to completely fix the issues once for all.
Method 2: Using the Control Panel
For users familiar with the Control Panel, this method provides an alternative way to adjust the always underline access keys setting:
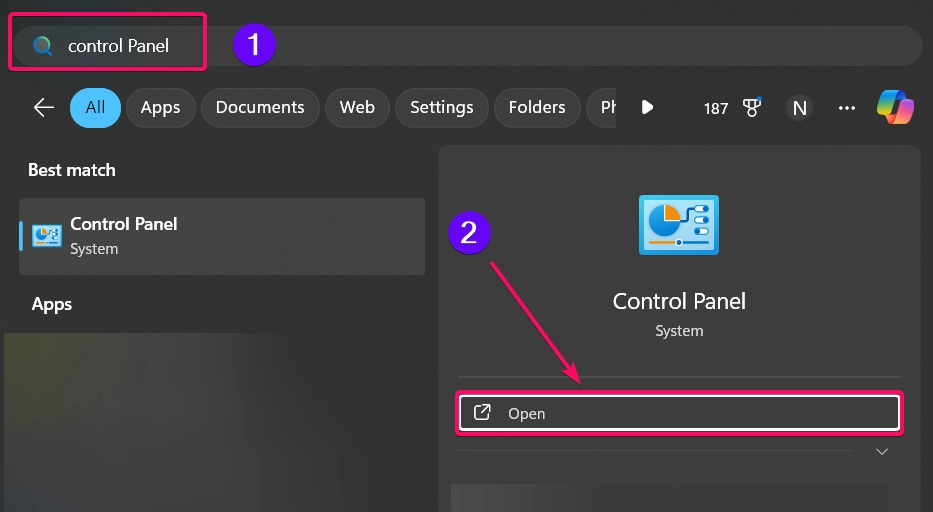
- Open Control Panel by typing “Control Panel” in the Windows search bar and selecting it.
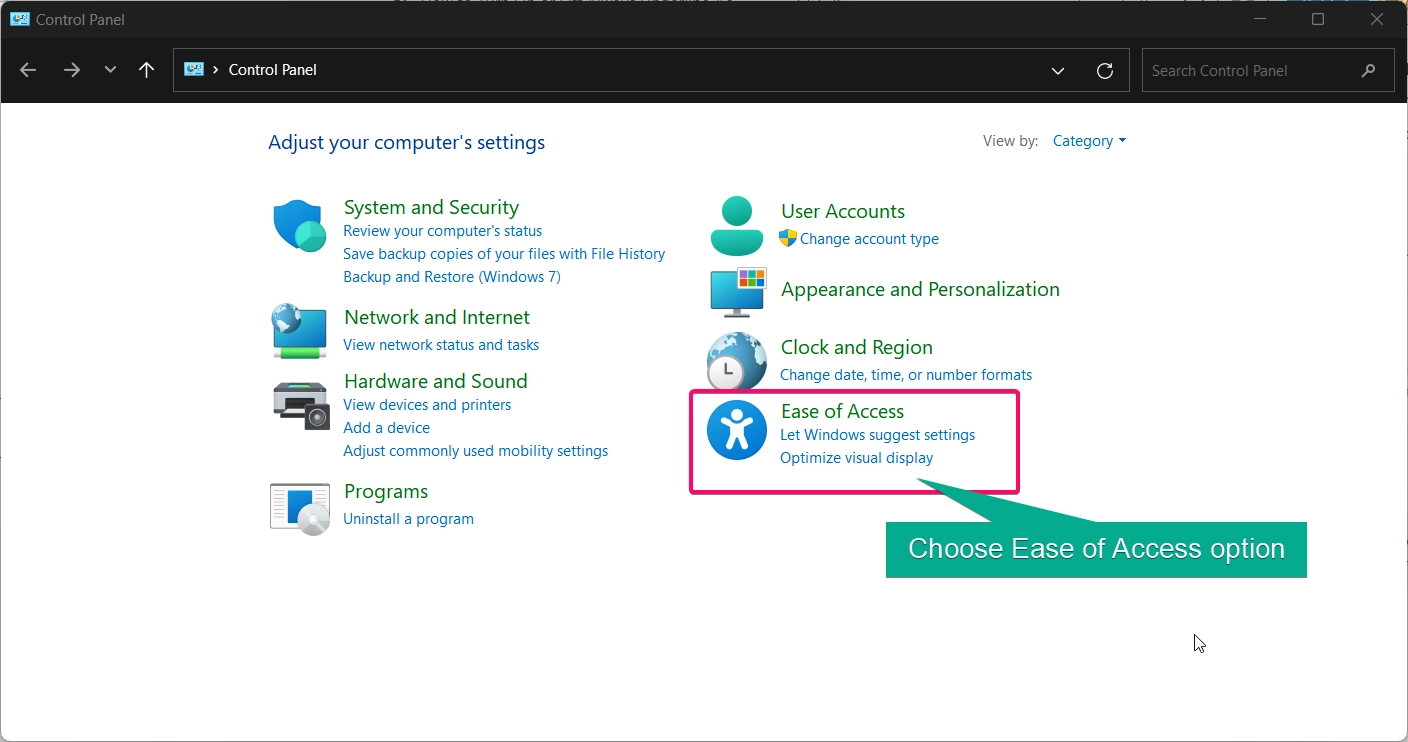
- Go to Ease of Access.
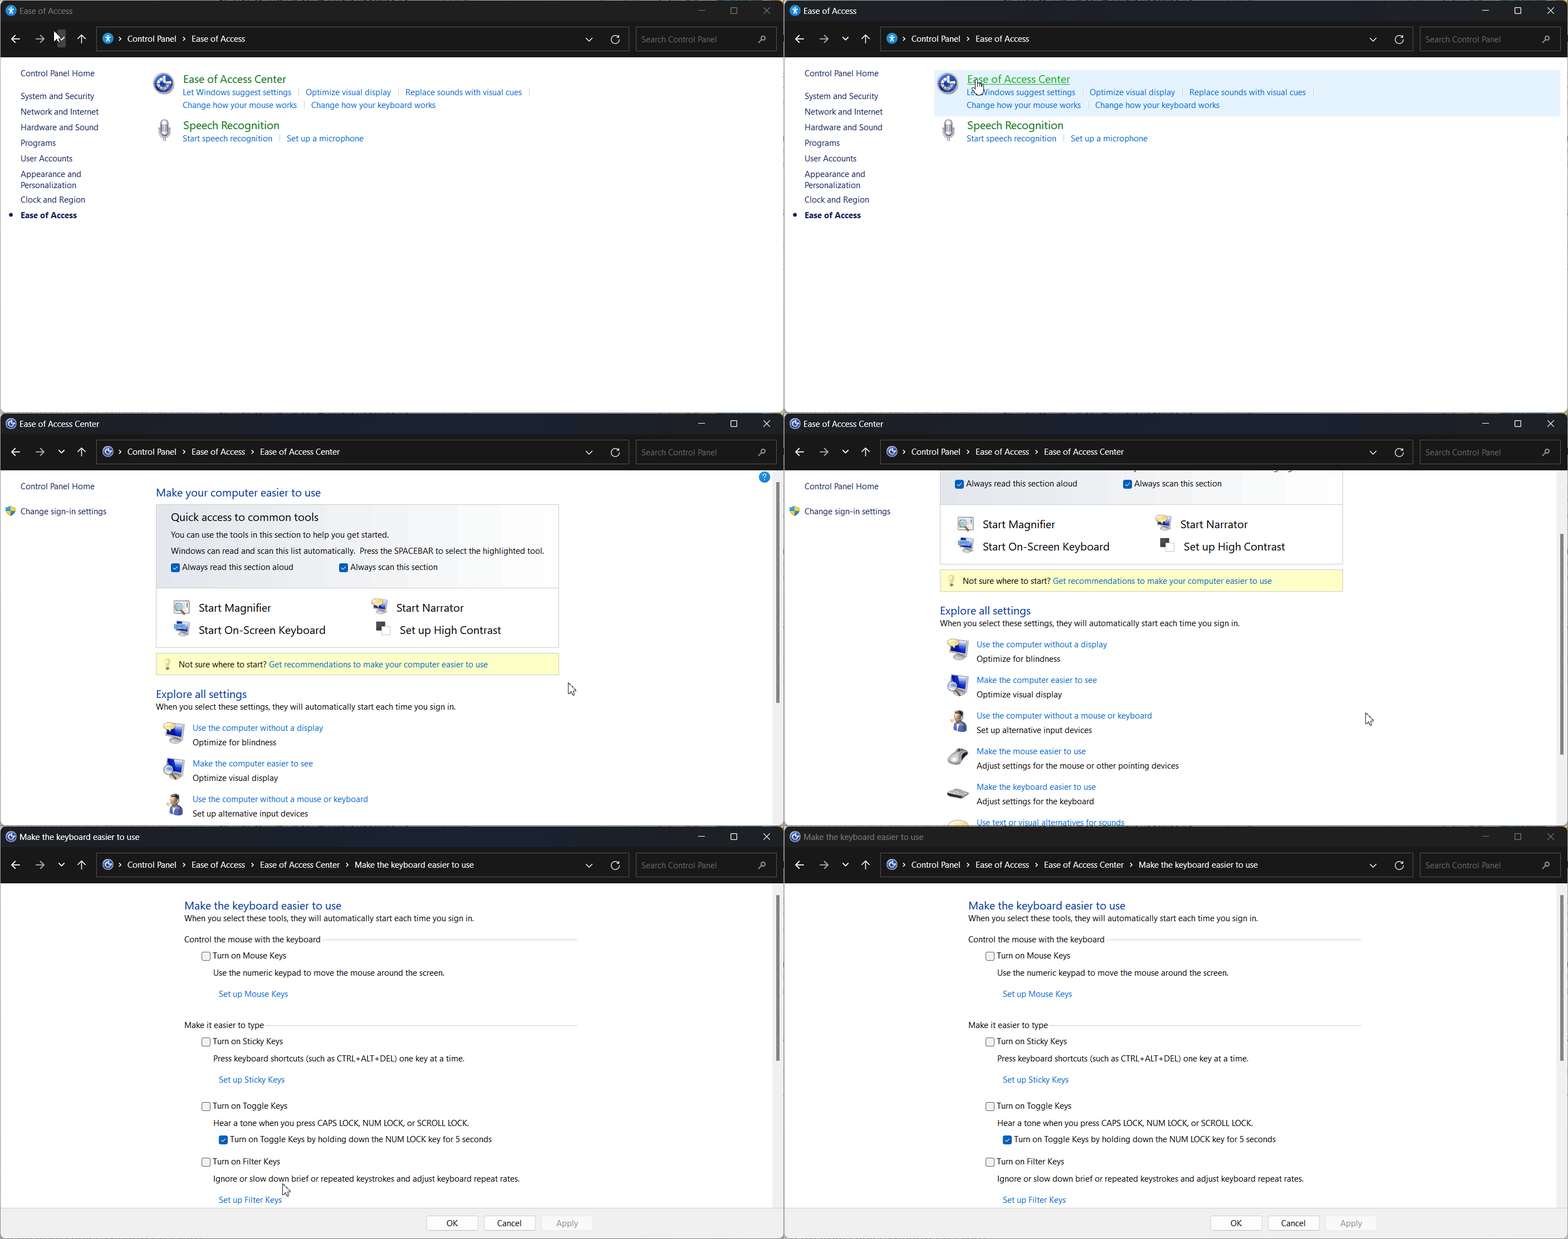
- Click on Ease of Access Center and then select Make the keyboard easier to use.
- Find the option labeled Underline keyboard shortcuts and access keys.
- Check the box to enable always underlined access keys or uncheck it to disable.
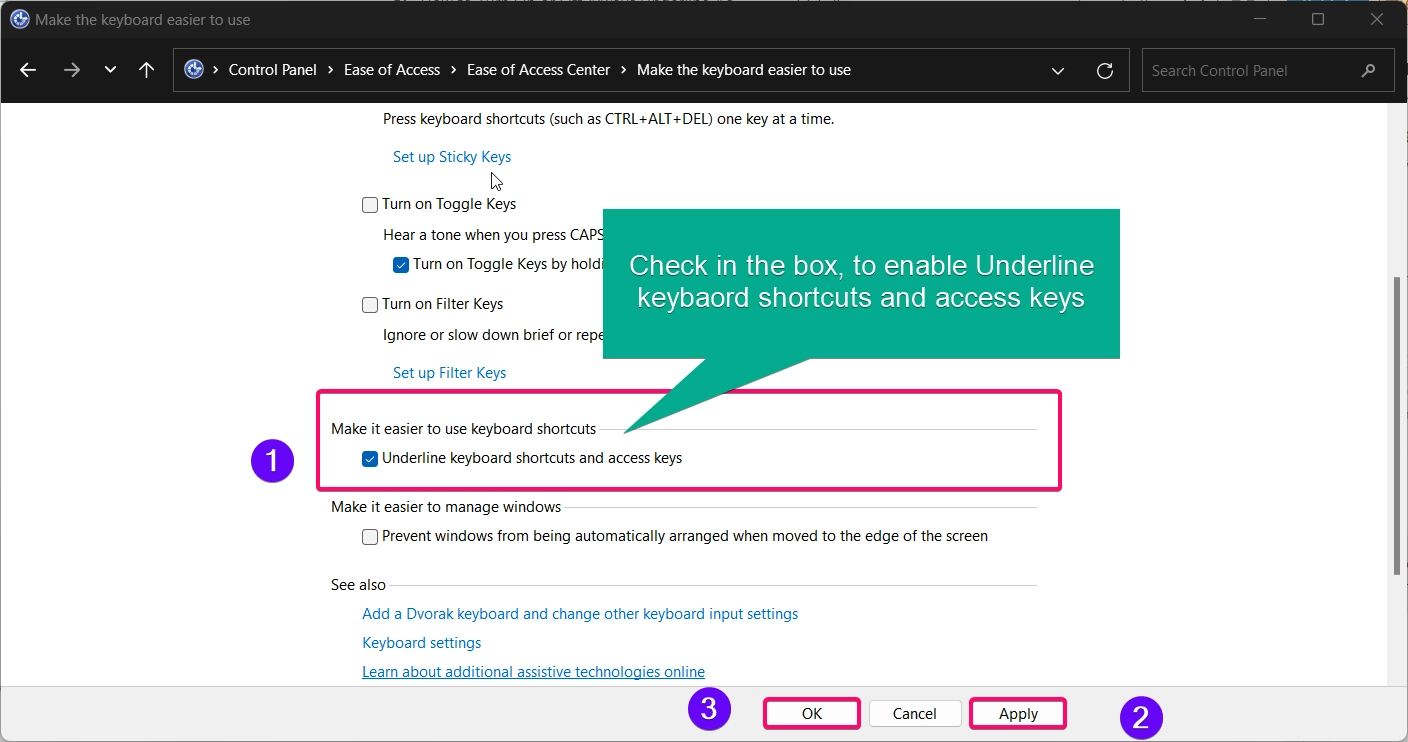
- Click Apply and OK to save your settings.
Note: This setting is also known as “Underline keyboard shortcuts and access keys,” which is a legacy term from earlier Windows versions.
Method 3: Using Registry Editor
Important: Editing the Windows registry can be risky if not done correctly. Back up the registry before making changes.
If you prefer a more advanced method, you can adjust the underline access keys setting via the Registry Editor:
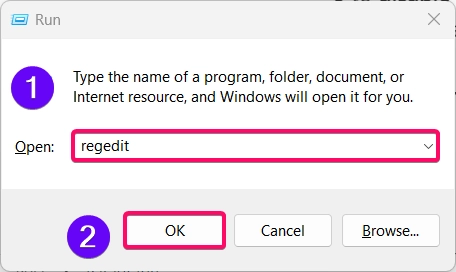
- Press Winkey + R, type
regedit, and press Enter to open the Registry Editor.
- Navigate to the following path:
HKEY_CURRENT_USER\Control Panel\Accessibility\Keyboard Preference
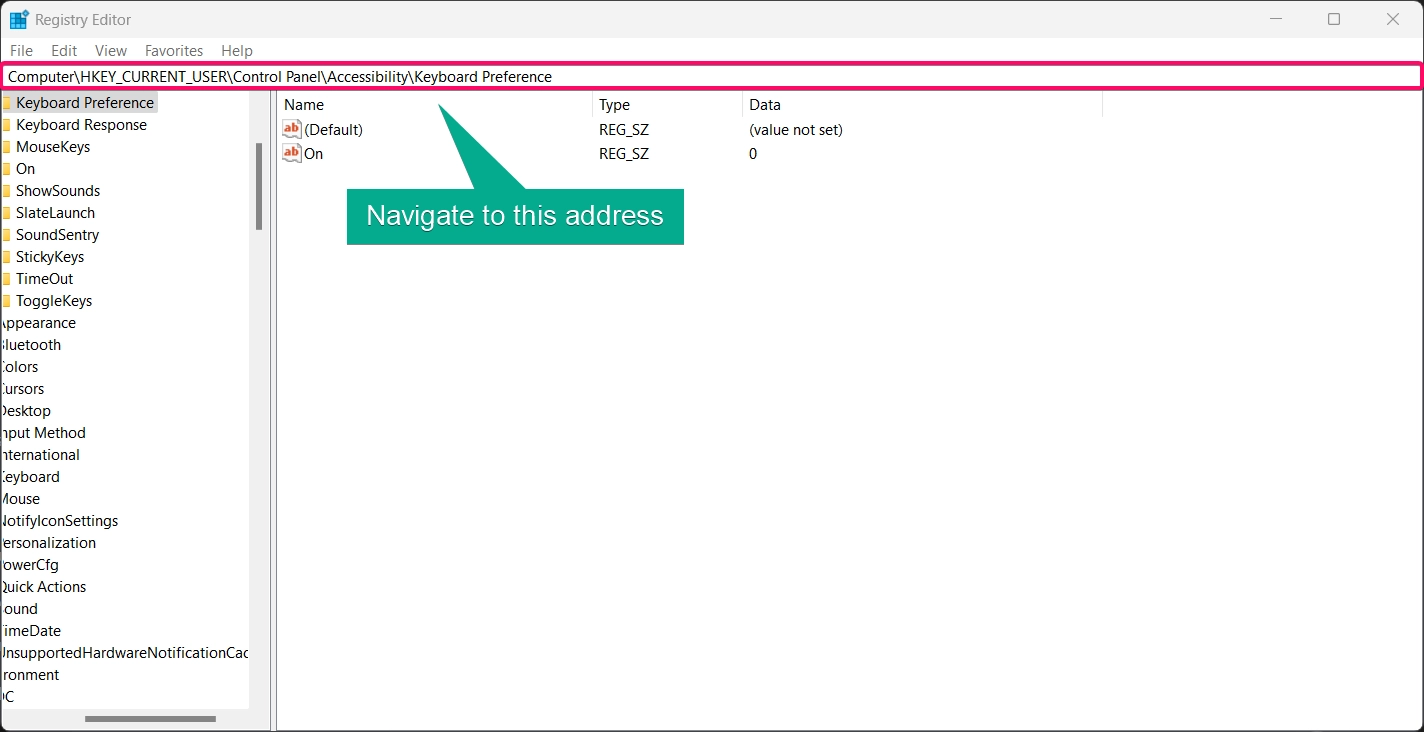
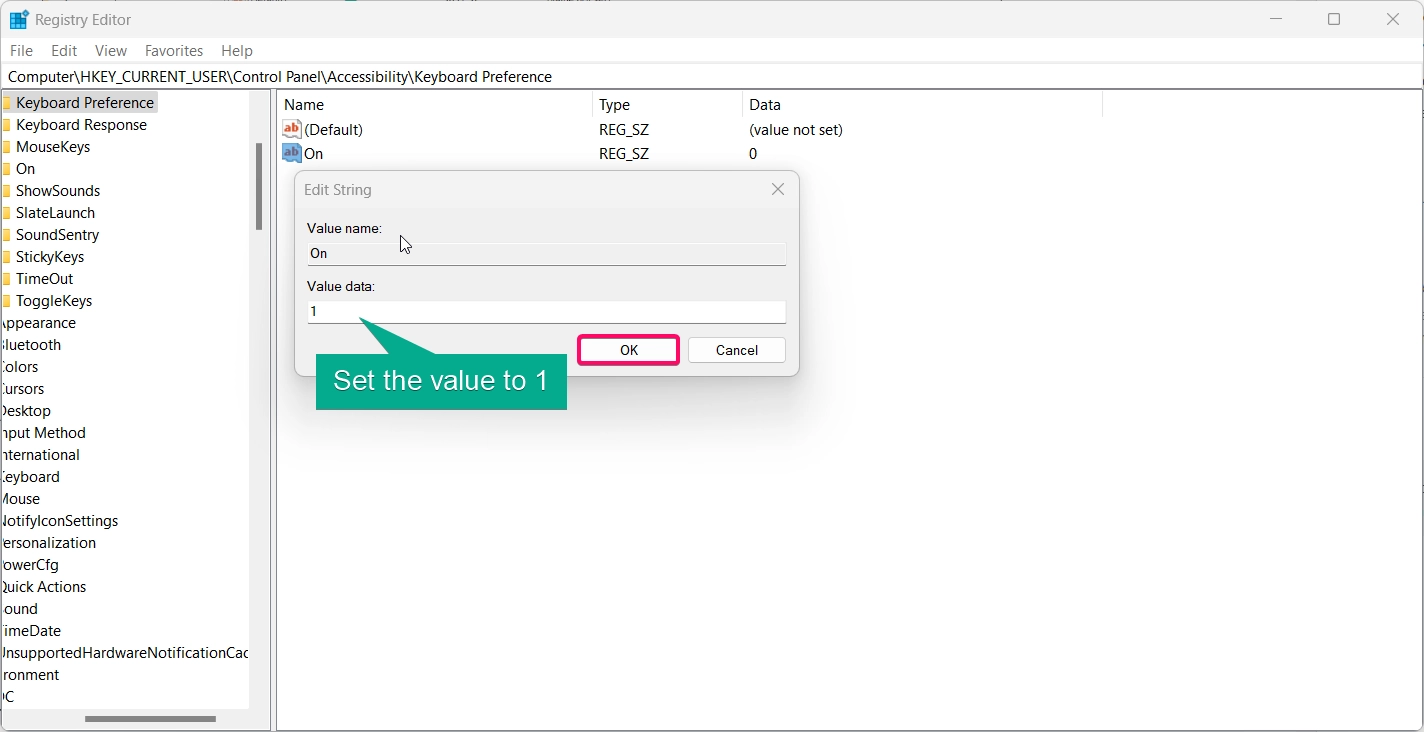
- Locate the On key. If it doesn’t exist, create a new
String Valuenamed On. - Set the On value to:
1to enable underlined access keys.0to disable them.
- Restart your computer for changes to take effect.
This method provides deeper control over the settings but should only be used by users familiar with the Windows registry.
Method 4: Using PowerShell Commands
For command-line enthusiasts, PowerShell offers a convenient way to toggle always underlined access keys:
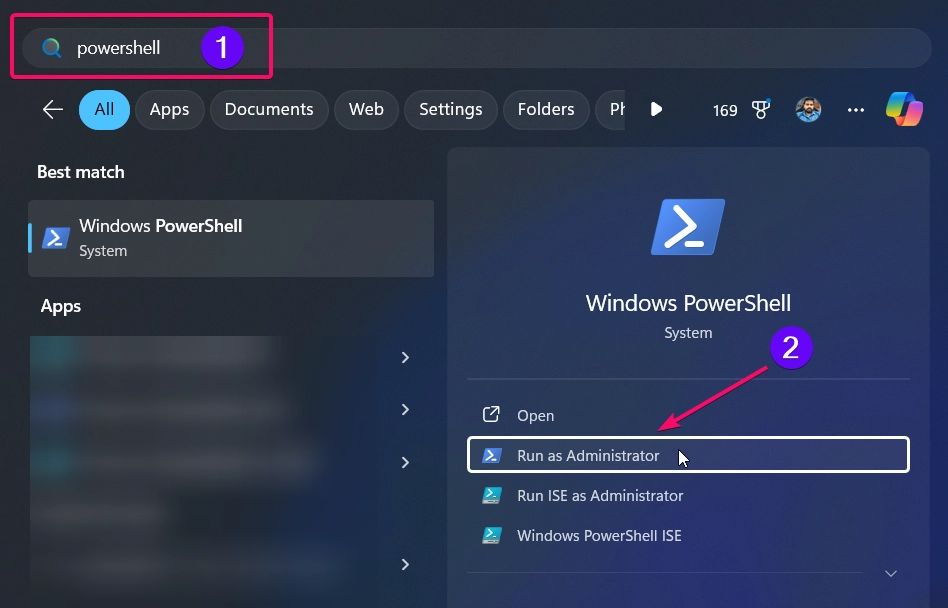
- Open PowerShell as Administrator by right-clicking the Start menu and selecting Windows Terminal (Admin).
- To enable underlined access keys, enter the following command:
Set-ItemProperty -Path "HKCU:\Control Panel\Accessibility\Keyboard Preference" -Name "On" -Value "1"

- To disable underlined access keys, enter:
Set-ItemProperty -Path "HKCU:\Control Panel\Accessibility\Keyboard Preference" -Name "On" -Value "0"

- Restart your computer to apply changes.
This command-line method provides a fast and straightforward way to adjust settings, ideal for users who prefer scripting and automation. Turning on or off always underline access keys in Windows 11 offers an easy way to customize your navigation experience. The methods above provide flexibility, whether you prefer using the Settings app, Control Panel, Registry Editor, or PowerShell. By enabling this feature, you can enhance accessibility and improve your productivity by having visible access keys at all times.
How to Get Rid of underline access keys Option in Windows 11?
- Press Windows + I to open the Settings app.
- In the left pane, click on Ease of Access.
- Scroll down and select Keyboard from the list of options.
- Scroll down to the section labeled Change how keyboard shortcuts work.
- Uncheck the option Underline access keys when available.
That’s it.
–Narendhiran V
References:
- Microsoft Answers. The ‘Underline Access Keys’ option is disabled, but it still appears?. Retrieved from Microsoft Answers on [18.2.25].
- Youtube Video. Underline access key shortcuts turn on or off | how to | Windows 10 | 2021 💻⚙️🐞🛠️! Retrieved from Youtube Tutorials on [18.2.25].
- Microsoft Answers. How do you get rid of the underline access keys in Windows 10?. Retrieved from Microsoft Answers on [18.2.25].