How to Change Account Picture in Windows 11?
5 Easy Methods to How to Change Account Picture in Windows 11 PC!
Changing your account picture in Windows 11 is a quick way to personalize your experience. Your account picture appears on the sign-in screen, Start menu, and in various apps which will making it as a reflection of your identity on the device. In this simple tutorial, I have provided the easy instructions for updating your account picture using various methods that includes: via settings app or control panel or Microsoft account or Photos app!. Updating your or change account picture gives a personal touch to your user profile. Whether you prefer a professional photo, an avatar, or something fun, your account picture is visible when logging in, making it a great way to add personality to your Windows 11 experience.
Quick Solution:
From Microsoft Support: Goto settings -> Choose Accounts -> Your Info, -> Under “Adjust your photo” option -> Choose a file option -> You can choose your image via “Browse files” or “Camera” or “Available Images”. This is one of the quickest and easiest way to change or update your account picture from your device.
Method 1: Using the Settings App
The Settings app in Windows 11 offers a straightforward way to change your account picture. Follow these steps:
- Open Settings by pressing Winkey + I.
- Go to Accounts in the left sidebar.
- Select Your Info.

- Under the Account settings section, you’ll see Adjust your photo.

- Click Browse files to upload a new picture from your device or Open camera to take a photo directly.
- Select your desired image, and it will automatically become your new account picture.
Tip: Make sure to use a square image for the best appearance on your profile.
Method 2: Using Your Microsoft Account
If you’re logged in with a Microsoft account, changing your account picture on the Microsoft website will sync it across your Windows 11 device and other connected Microsoft services:
- Open a web browser and go to account.microsoft.com.
- Sign in with your Microsoft account.

- Under Your info, you’ll see your current profile picture. Click Change picture.

- Choose Add a new picture and upload an image from your computer.

- Crop and adjust the image as desired, then save it.
Note: Changes made here may take some time to sync across all Microsoft services and your Windows 11 device.
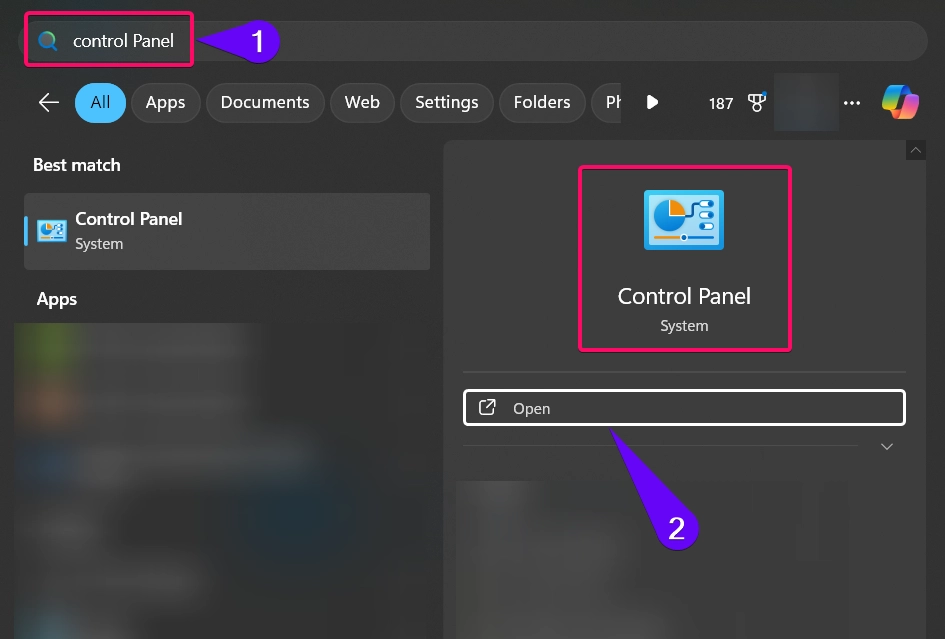
Method 3: Using the Control Panel
The Control Panel offers an alternative way to change your account picture, especially for users with a local account:
- Open Control Panel by typing “Control Panel” in the Windows search bar and selecting it.
- Go to User Accounts > User Accounts option.


- Choose the Make Changes to my account in pc settings.
- It will launch the settings app and follow the steps mentioned the method 1 mentioned above.
This method is particularly useful for users familiar with legacy settings in Windows.
Method 4: Using the Photos App
For a creative approach, you can use the Photos app to set any image as your account picture directly:
- Open the Photos app by searching for it in the Start menu.

- Browse your photos and select the image you want as your account picture.
- Right click on the image, and from the dropdown menu, select Set as > Set as account picture.
- Confirm, and your account picture will be updated instantly.
This method allows you to select and edit images within the Photos app before setting them as your account picture.
That’s it.
–Narendhiran V.
References:
- Microsoft Support. Change Your Account Picture in Windows. Retrieved from Microsoft Support on [10.2.25].
- Microsoft Answers. Change Sign In Picture. Retrieved from Microsoft Answers Forum on [10.2.25].
- Reddit Community. Change Account Picture in Windows 11. Retrieved from Reddit Community WinSides on [10.2.25].
- Youtube Community. How To Change Windows 11 User Account Picture [Guide]. Retrieved from Youtube Community MDTechVideos on [10.2.2025]

