How to Clear Recent Colors in Windows 11?
3+ Methods to Change Accent Color in Windows 11 PC!
Windows 11 offers many customization features, and one of those is its recent colors history. When you change accent colors frequently, Windows stores your recent color choices for quick access. However, you may want to clear this list for a fresh start or privacy reasons. In this tutorial, I will take you through multiple methods to clear recent colors history in Windows 11, offering both simple and advanced solutions. Clearing your recent colors history in Windows 11 can help you reset the look and feel of your device, especially if you experiment with different colors often. It can also prevent others from seeing your previously selected colors if you share your computer.
Windows allows users to create and delete custom theme colors. As Microsoft Support explains, the process involves modifying the color settings in Windows. Learn more.
Method 1: Clear Recent Colors History via Registry Editor
One effective way to clear the recent colors history is by using the Registry Editor. This method involves modifying Windows registry values, so proceed carefully.
- Open Registry Editor
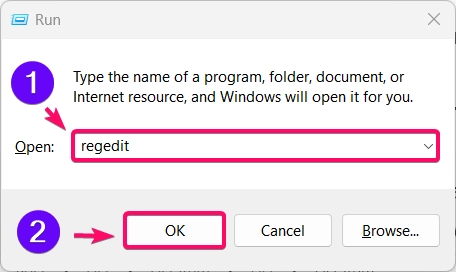
- Press Winkey + R to open the Run dialog, type
regedit, and press Enter.
- Press Winkey + R to open the Run dialog, type
- Navigate to the Colors Key
- Go to
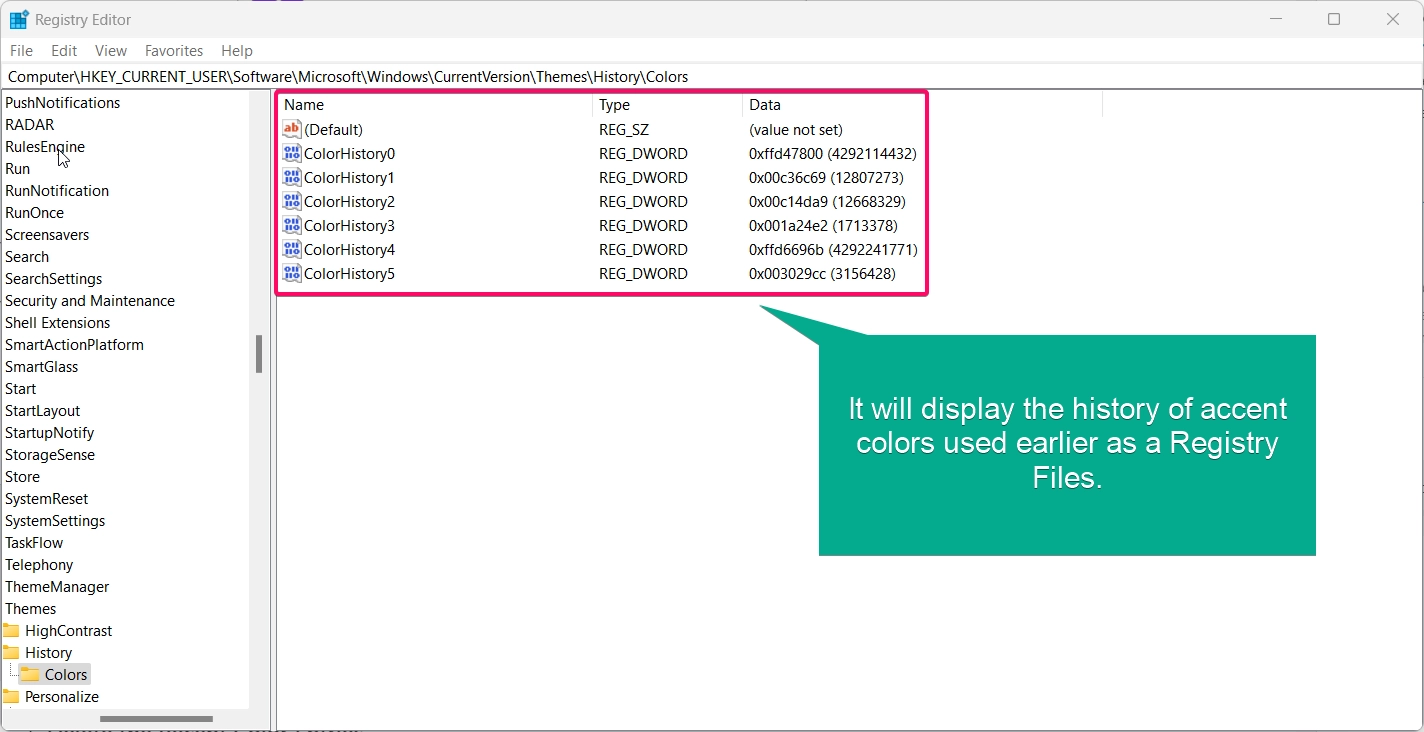
HKEY_CURRENT_USER\Software\Microsoft\Windows\CurrentVersion\Themes\History\Colors.
- Go to
- Delete the Recent Color Entries
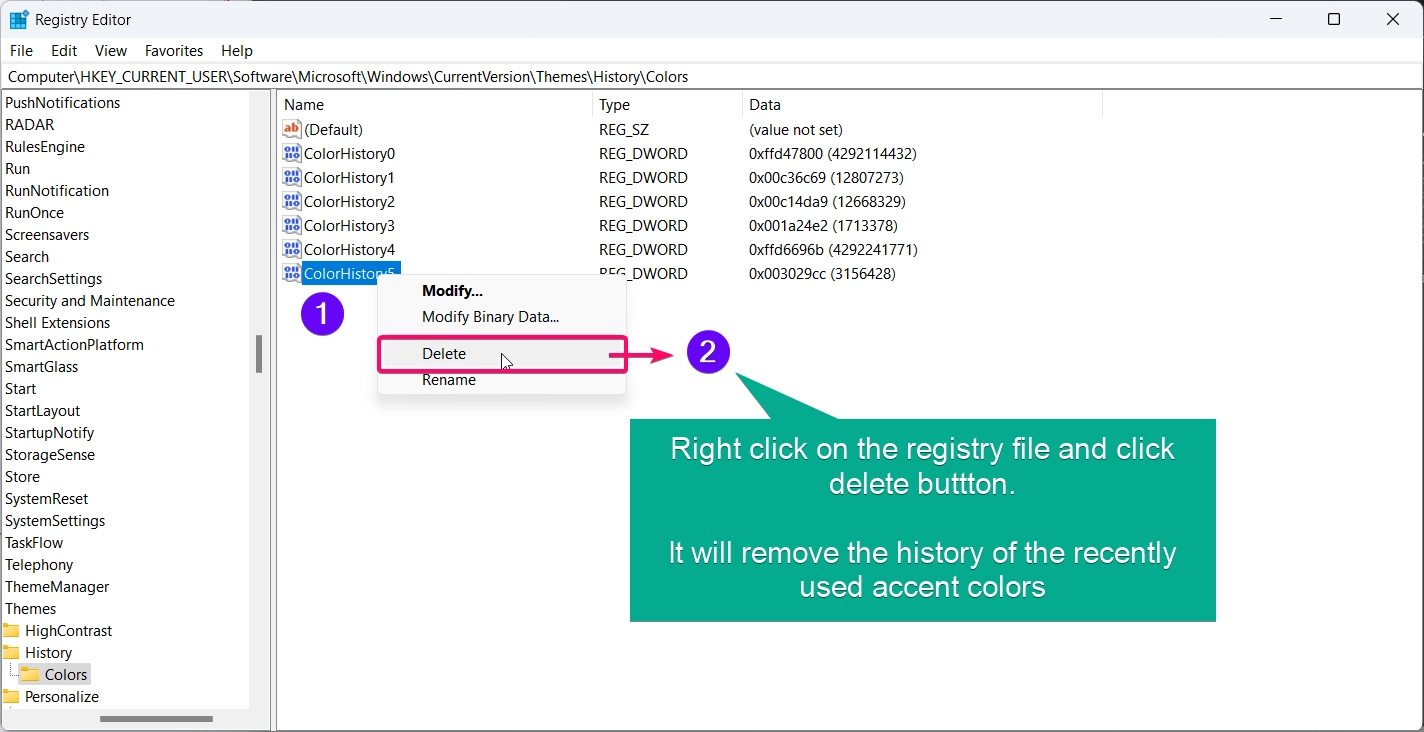
- In the Colors folder, you’ll see entries representing recent colors. Right-click each entry and select Delete to clear the history.
- Close Registry Editor
- Once you’ve deleted all the entries, close Registry Editor. Windows will now remove the recent colors from the history.
Keep in Mind: Be cautious when editing the registry, as incorrect changes can impact your system.
Method 2: Use Windows PowerShell
PowerShell offers a quick and advanced method for users comfortable with command-line tools. This method deletes recent colors history using a single command.
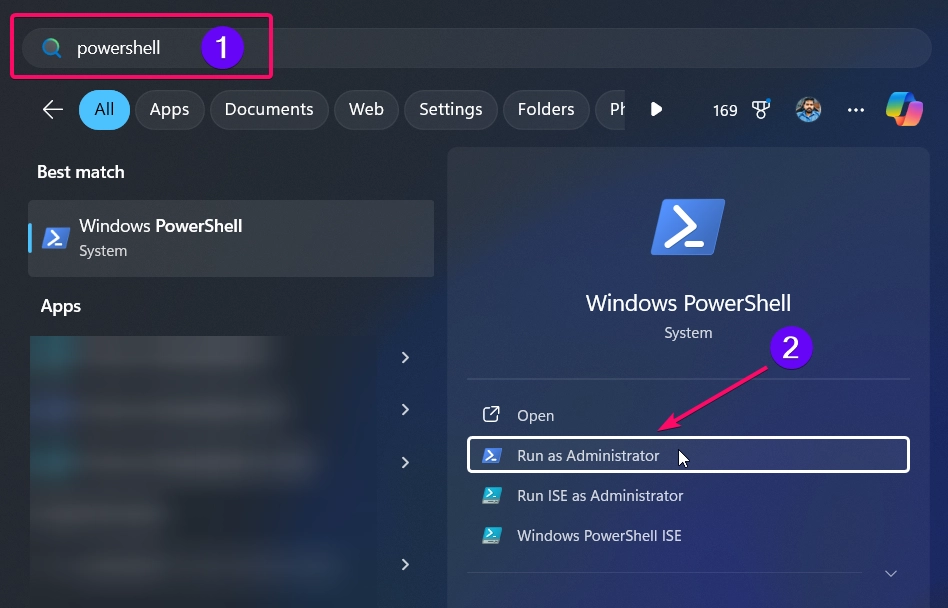
- Click the Start Menu and search for PowerShell
- You need to choose the “Run as Administrator” option to launch the powershell in admin mode.
or you can follow the below keyboard shortcut to launch powershell.
- Open Windows PowerShell
- Press Winkey + X and choose Windows PowerShell (Admin) from the menu.
- Run the Command
- Type or paste the following command:
Remove-ItemProperty -Path "HKCU:\Software\Microsoft\Windows\CurrentVersion\Themes\History\Colors" -Name *
- Press Enter to execute the command.
- Type or paste the following command:
- Verify the Changes
- Open Settings and check the recent colors section. You’ll see that the history is cleared.
Important: Make sure to run PowerShell as an administrator for this command to work properly.
Method 3: Clear Recent Colors by Resetting Personalization Settings
If you prefer not to use the Registry Editor or PowerShell, resetting personalization settings is another option. This method may reset other customizations along with color history.
- Open Settings
- Press Winkey + I to open Settings, then go to Personalization.
- Reset Colors and Theme
- Change your theme to a default Windows theme under Themes. This can reset personalization settings, including recent colors.
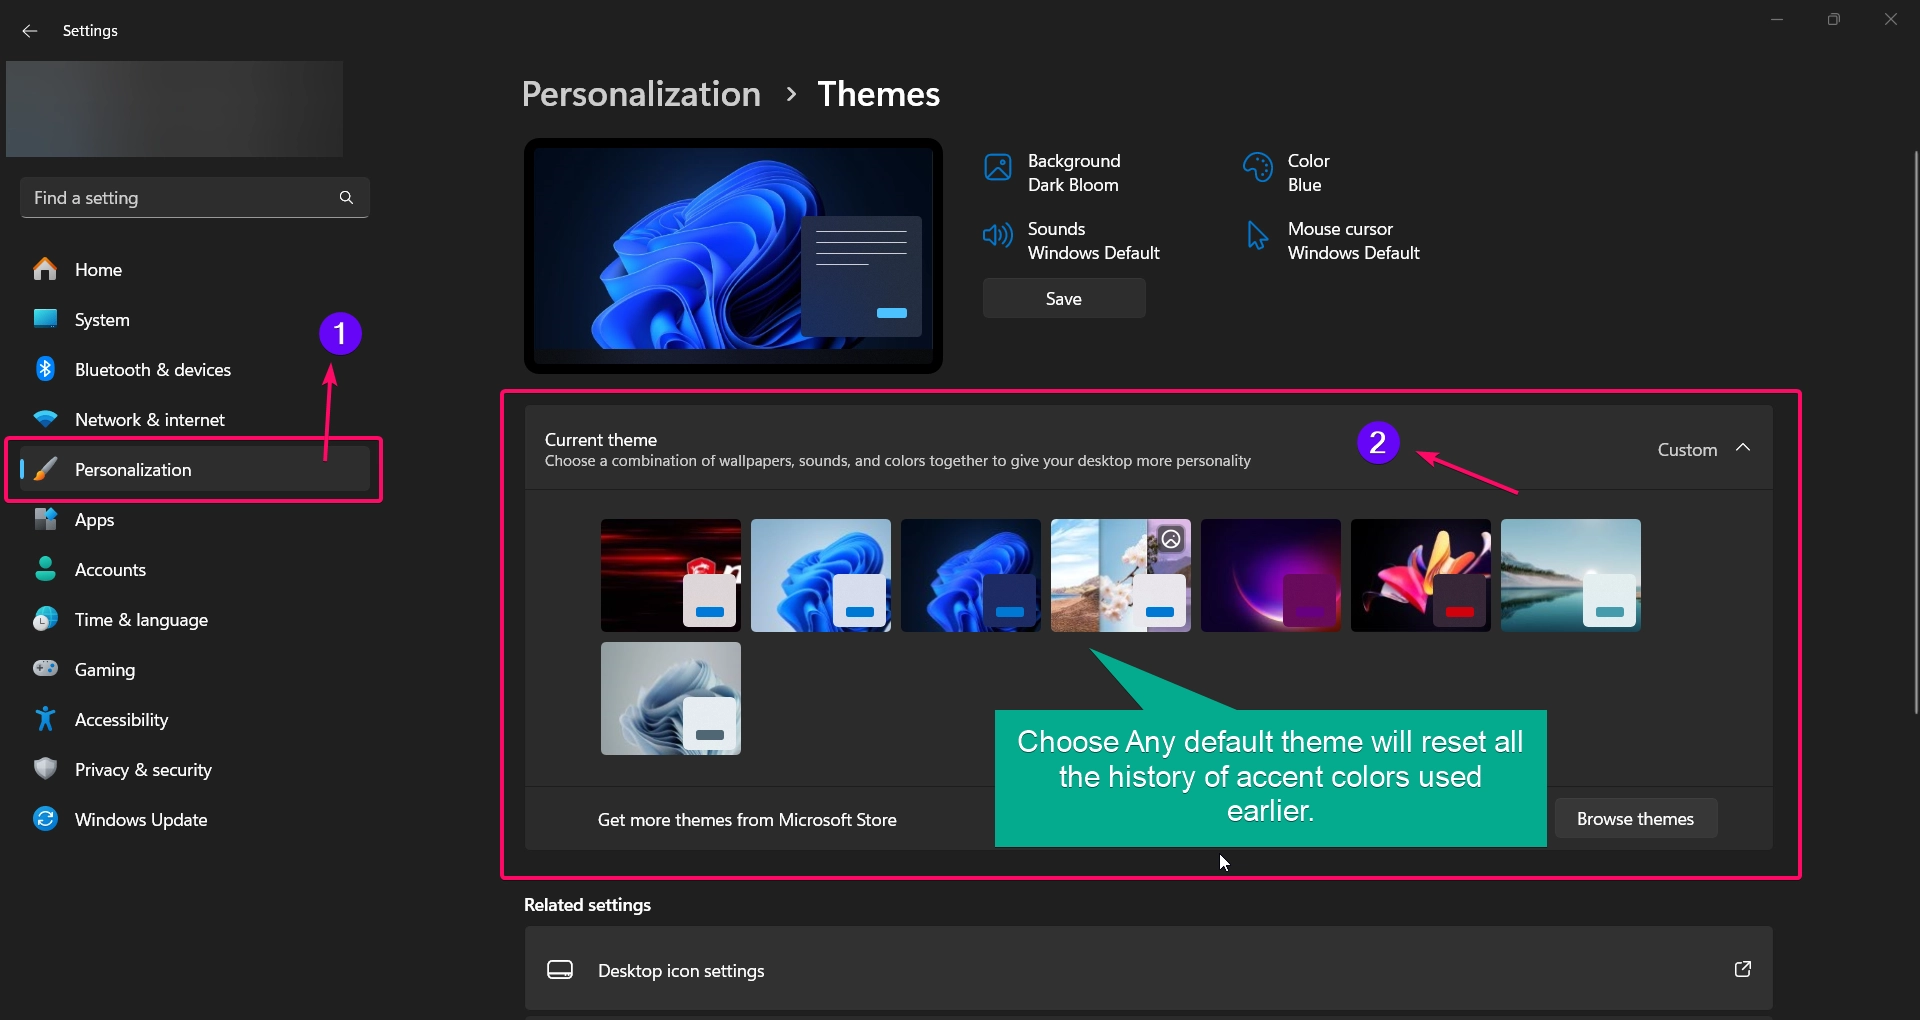
- Verify the Change
- Go back to the Colors section in Settings to confirm that the recent colors history is cleared.
Note: This method may revert some of your personalization settings, so you may need to reapply certain themes or adjustments.
That’s it.
-Narendhiran V
Take Away:
Clearing recent colors history in Windows 11 is simple with the right steps. Whether you use Registry Editor, PowerShell, Settings, or third-party apps, each method provides a way to start fresh and remove past color choices. Try these methods to keep your color options clear and organized in Windows 11. If you have any queries related to the above topic and then feel free to comment us below! Find more interesting tutorials on our Homepage: Win11-Verse.com
References:
Microsoft Support. Create or delete a custom theme color. Retrieved from Microsoft Support on [31.1.25].

